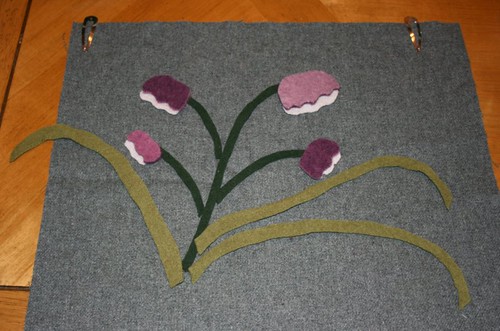
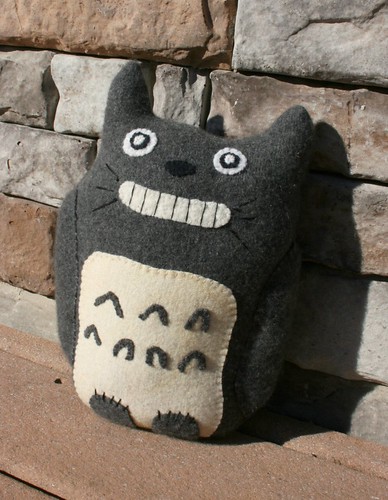
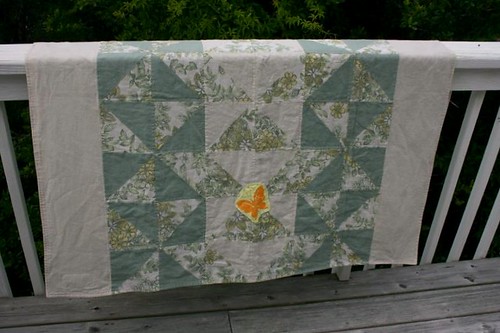
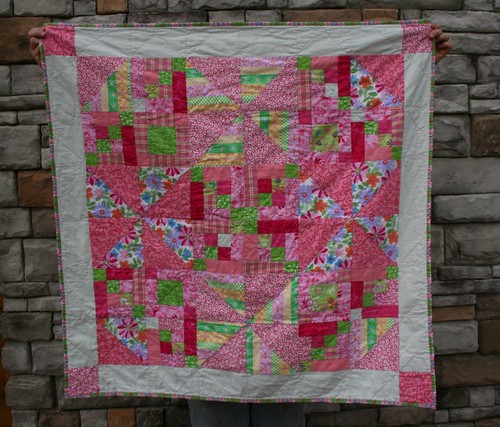
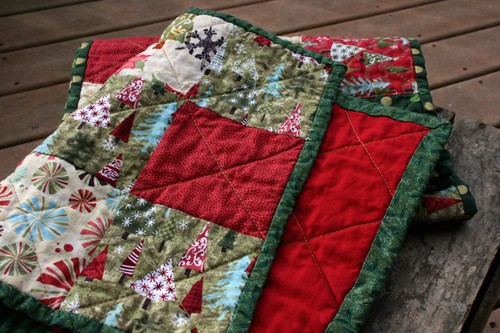
A custom project for a friend of mine. I'm slowly getting better at designing plushies and they can be a lot of fun to make. I hope my friend likes these, because I think Steve was disappointed to see them go.
Wednesday, June 20, 2012
Sunday, June 17, 2012
Custom Project, March 2012
Back in March I was working on another commissioned project, a custom heart ornament. It was to be a surprise for the recipients in May, so I didn't post anything ahead of time lest someone found out about it too early. Then things got in the way (actually spring got in the way, to be exact) and I'm just now posting pictures for this one. I won't say much about it other than the symbols have a distinct meaning for the recipients. This is a keepsake, a memento, something that the giver hopes will inspire the recipients for the rest of their lives.

This is the first time that I've dyed wool a certain color rather than rummage through my stock in the hopes that I might have the exact shade of "lemon yellow" requested by a customer. I used Rit dye and it was very, very easy to dye all the pieces I needed in a stock pot on the top of the stove.
Too easy, in fact, and now I find myself looking at other pieces of wool and wondering what it might look like after a bath in cactus green, bamboo, or tangerine tango. Hmmm.....
Tuesday, May 8, 2012
Baby Shower Gifts

I attended a baby shower this past weekend for a friend of ours who is expecting a baby girl this summer. Miraculously I had a stash of flannel material just waiting to be used in a crib sized rag quilt. This is the second rag quilt I've made, and it was even easier than the first time around. Rag quilts come together very quickly, especially the smaller sized throws. I cut the squares for this on a Sunday, sewed the x-blocks on a Monday, and finished sewing and clipping the edges of the blocks by Wednesday.
This is the front with the actual ragging. When my daughter was about 9 months old, she could spend an hour playing with loose threads and tags. I'm hoping this new little girl will also find all that ragging equally fascinating.

Here's the back of the quilt. The seams look like a traditional quilt from this side. I'm pleased to see that I'm getting better at making all those rows and points more precise now.
About the only drawback to making a rag quilt is the vast quantity of linty threads that you find on everything after you've washed it. I washed and dried this one twice and it was still shedding threads. That should let up by the time it's washed a time or two more. And with a baby, that may be in the first week of actual use.
I had plenty of flannel material left over to make a couple of taggie burp cloths. These are a great portable size that can do double duty as a snuggie in a car seat. I make the tag loops big enough that little fingers won't get caught in them, but small enough that a little hand won't get caught either.
And some leftover x-blocks that didn't make it into the quilt were made into simple squares that could be used as wipes, washcloths, or whatever. (I told the dad-to-be to use these to wash his car when the baby no longer needs them.)

And finally I decorated a couple of onesies with some appliqued fabric scraps.
I'm amazed that I completed this entire project completely with materials on hand and didn't need to purchase anything. (For once!)
Monday, March 12, 2012
Patty's Pillow
Remember that sneak peek I gave you last week of a work in progress? The one I wanted to finish the following day?
Ha. That was clearly an optimistic deadline for this particular project, which was meant for a friend who is getting married next month. This weekend we hosted a brunch in her honor. Three 4 year olds, a one year old, a second grader, and seven adults. It was chaos, but in a good way. My only regret is that I wasn't able to finish my gift for the bride-to-be before everyone arrived. No matter, in the end I completed it Saturday afternoon and wrapped it up to take to the bachelorette party that night. And then I promptly forgot it and left it on the coffee table at our house. Sigh.
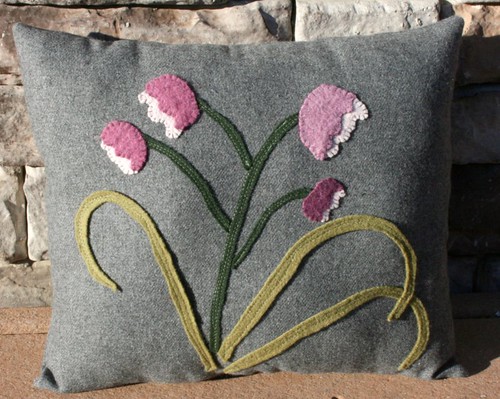
But I was really thrilled to receive the wedding invitation in the mail last Friday. The couple chose a lovely combination of colors that included plum, purple, and pistachio. Much like the colors I picked out for the bride's pillow before I even knew what her color scheme might be. Booyah!
Anyhoo, I'll just take it with us to her wedding.
Ha. That was clearly an optimistic deadline for this particular project, which was meant for a friend who is getting married next month. This weekend we hosted a brunch in her honor. Three 4 year olds, a one year old, a second grader, and seven adults. It was chaos, but in a good way. My only regret is that I wasn't able to finish my gift for the bride-to-be before everyone arrived. No matter, in the end I completed it Saturday afternoon and wrapped it up to take to the bachelorette party that night. And then I promptly forgot it and left it on the coffee table at our house. Sigh.

But I was really thrilled to receive the wedding invitation in the mail last Friday. The couple chose a lovely combination of colors that included plum, purple, and pistachio. Much like the colors I picked out for the bride's pillow before I even knew what her color scheme might be. Booyah!
Anyhoo, I'll just take it with us to her wedding.
Thursday, March 8, 2012
Shop Update, March 8, 2012
I made some felted heart ornaments from the Fair Isle patterned wool leftover from my patchwork rug.
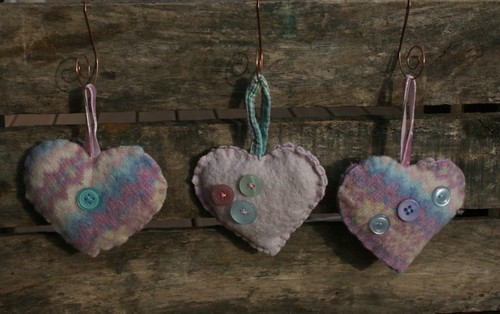
These would make beautiful decorations for a nursery!
Lately it seems like I've been doing everything other than quilting. After my venture into free motion machine quilting went awry in February, I've been focused on reorganizing my sewing area and supplies. The quilt lab is now in prepped and ready to go, so just maybe I can finish that last quilt and finally start a new one.
Wednesday, March 7, 2012
Thursday, March 1, 2012
Shop Update, March 1, 2012
Tuesday, February 28, 2012
Totoro!
My daughter is a big fan of Hayao Miyazaki's animated movie My Neighbor Totoro. Totoro is a big gray forest troll who befriends two girls and helps them in a time of crisis. It's a lovely little movie and I thought Ally might like to have a totoro of her own.
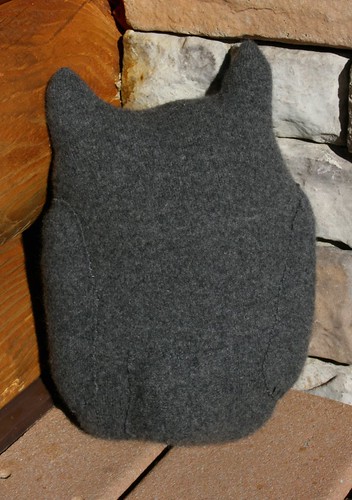
The main body is machine stitched for durability. After I made the main body I appliqued Totoro's arms and fat tail with a blanket stitch. His arms and tail have additional stuffing (scrap polyfill quilt batting) in them for a dimensional effect.
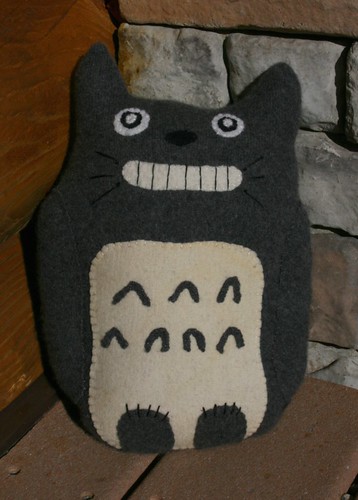
This Totoro plushie is about a foot tall and made from a super-soft gray felted lambswool sweater. All of his features are also made from recycled felted wool clothes. I did use polyfill stuffing in him as I thought my usual felted wool scraps would be too heavy for a toy.

The main body is machine stitched for durability. After I made the main body I appliqued Totoro's arms and fat tail with a blanket stitch. His arms and tail have additional stuffing (scrap polyfill quilt batting) in them for a dimensional effect.

Totoro's whiskers and claws are done in black embroidery floss. Really, he's constructed using the same techniques I use with all of my primitive crafts. That Cheshire Cat smile just kept reminding me of my jack o'lantern penny rug.
In the end, I ended up making what may be the world's first primitive plushie based on a anime character.
Tuesday, February 14, 2012
Free Motion Quilting Fail, or Why I'm Sewing Christmas Stockings in February
I have a quilt that I've pieced and assembled into a quilt sandwich (top, flannel sheet batting, and backing) but I haven't quilted it yet. This particular quilt is calling for something different than my usual cross-hatch or parallel row quilting and I want to use a more organic quilt pattern on it. Something with loops or wavy lines. Something I haven't tried yet. I've been waiting to master the art of free motion quilting before finishing this particular quilt. (And to perfectly honest, I've been procrastinating on learning how to free motion quilt by trying to organize my fabrics and felted wool before the produces of "Hoarders" came knocking at the door. Now that I've dragged all that stuff out and haven't found a good way to organize it, I'm tired of messing with fabric and want to complete some unfinished projects, like that quilt. The piles of fabric and wool can just stay on the floor for a while longer.)
In theory I know how to free motion quilt. I've read articles on it and watched videos on YouTube showing how it's done. I have a darning foot and my machine allows me to drop the feed dogs. However, as often is the case, *knowing* how to do something and actually *doing* it can be two different beasts. I started practicing free motion quilting yesterday morning and had some difficulty with it. The foot kept bouncing around and I thought it was much harder to maneuver my test piece around than it should have been.
Poking around on the web led me to a website devoted to free motion quilting, Leah Day's The Free Motion Quilting Project, which has some GREAT teaching videos on it. (Even if you don't quilt, take at look at Leah's website and see the beautiful quilting patterns she's produced and illustrated.) In particular, I found this video on modifying your darning foot to be very useful. Following Leah's suggestions, I hacked my darning foot and voila! That annoying bounce disappeared and I was able to maneuver my fabric around much more smoothly. I spent another hour practicing and felt much more confident in my ability to free motion quilt.
Then this morning I sat down to practice again and had nothing but problems with thread tension. Snarls with excessive loops of thread on both the top and the bottom of my practice piece. I adjusted the tension up and down, trying to get rid of those ugly bird's nests, but nothing seemed to work.
I've learned from past mistakes that you can't force a project that doesn't want to cooperate. It's best to set it aside and try again later. And that's how I wound up sewing a couple of Christmas stockings and attempting to make fleece socks today instead of free motion quilting. The stockings had been in my work-in-progress pile for awhile, so at least that counts as cleaning up!
Monday, January 30, 2012
Chopping Wool
I'm a little obsessed with using as much of my craft supplies as I possibly can. When I cut felted wool, I always have bits and pieces left over. Generally they collect in a paper bag until I have the time to sort through them.
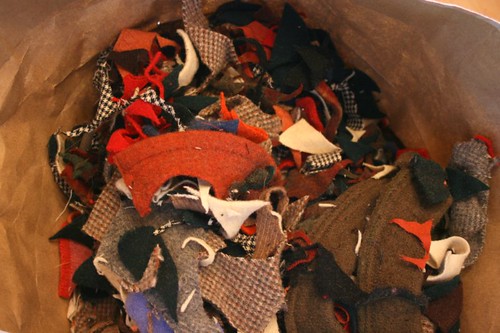
When I have the time (or when the number of paper bags full of wool scraps gets to be too much), I'll got through one of these bags and set aside the pieces that I think I might be able to use again. The rest get chopped up into small bits to use as stuffing material. I like the weight and firmness that wool bits give my ornaments; polyester fiberfill just doesn't feel right to me. Also, the wool scraps certainly don't cost anything and it's just another form of recycling.
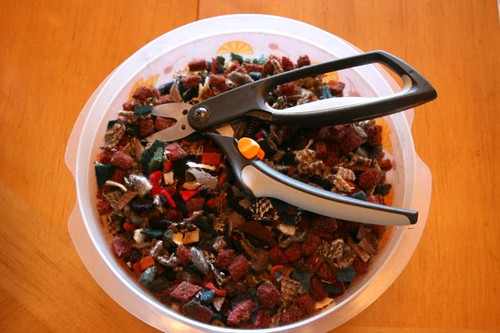
Chopping wool is time consuming and messy. Wool felt may not fray, but it does shed many, many tiny fibers. I prefer to cut my wool felt outside on the deck, where the wind can blow away the lint and tiny scraps, but the weather doesn't always cooperate for this in the winter. If I chop wool inside I try to do it in a container that will catch most of the lint, but there's always some that escapes to form multicolored dust bunnies under the furniture in the living room.
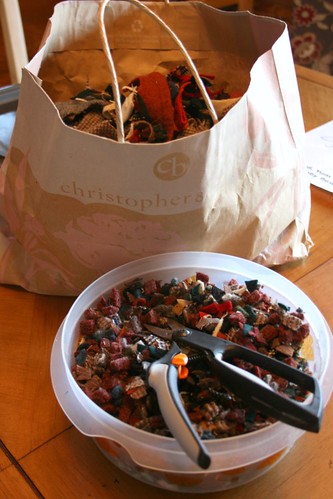

When I have the time (or when the number of paper bags full of wool scraps gets to be too much), I'll got through one of these bags and set aside the pieces that I think I might be able to use again. The rest get chopped up into small bits to use as stuffing material. I like the weight and firmness that wool bits give my ornaments; polyester fiberfill just doesn't feel right to me. Also, the wool scraps certainly don't cost anything and it's just another form of recycling.

Chopping wool is time consuming and messy. Wool felt may not fray, but it does shed many, many tiny fibers. I prefer to cut my wool felt outside on the deck, where the wind can blow away the lint and tiny scraps, but the weather doesn't always cooperate for this in the winter. If I chop wool inside I try to do it in a container that will catch most of the lint, but there's always some that escapes to form multicolored dust bunnies under the furniture in the living room.

We had a nice day early last week and I was able to process one of my bags of wool scraps out on the back deck. I'm glad I took the time to chop all that wool, too, as my customer in Texas asked me on Friday if I could make another 25 heart ornaments in time for her wedding!
Tuesday, January 24, 2012
Using a Light Box
Much has been said about the value of good photography when you're selling online. A potential customer can't pick up your item to examine it, so you have to be able to convey a great amount of detail in your product description and through your photos. You probably won't make the sale just on your item description alone so it's imperative that your photographs be crisp, attractive, and informative. And you need more than just one photograph, too.
I prefer taking photos outside in natural light, but at this time of the year it's very hard to get a good shot because 1) it's always dark, 2) it's often windy with some form of precipitation, or 3) it's dark, windy, and either raining or sleeting. On the rare occasion that it's not dark and not windy, and some form of water isn't coming down from the sky, the sun will be so low on the horizon that the light is harsh, the shadows are too stark, and all my pictures look like crap.
So what do you do when you need to take good photographs of something you want to sell online, but you don't have any natural light to work with? Use a light box.
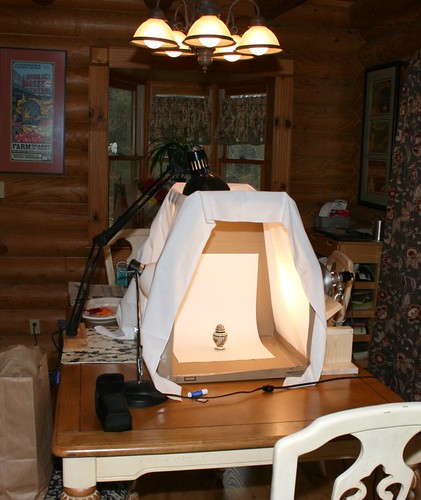
Steve built me a light box out of a cardboard box for Christmas. There are many tutorials on how to do this on the web, just search for "DIY light box" and you'll find them. Essentially a light box is a box with windows covered by thin white material or tissue paper. There are lights outside the box shining light into the middle of the box, which is where you place the object you want to photograph. The light is filtered through the material or paper to eliminate harsh shadows. A sheet of curved white posterboard provides the background inside the box and also produces a pretty cool effect known as the "infinite sweep" or "infinite horizon" in your photos.
So what does a light box look like? Here's my light box set up on the dining room table. The overhead light provides some illumination, but the desk and work lights set up around the box are what really makes it work.
No, it doesn't look like much, but look at what it can do:
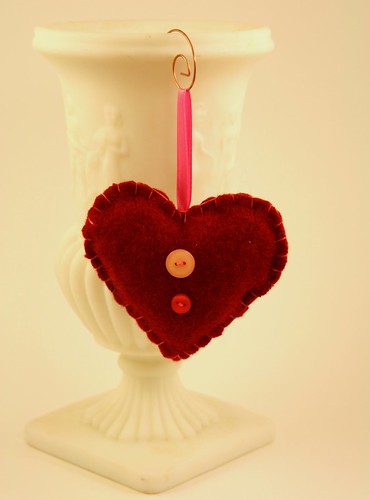
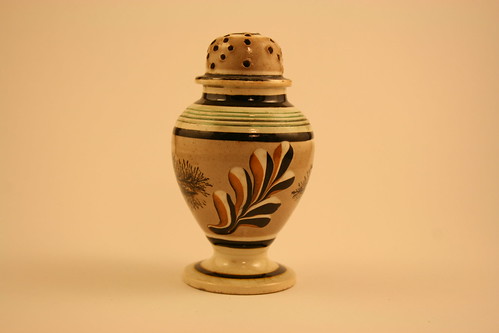
Florescent lights will give a yellowish cast to the light. Here is an original, untouched photo.
However, you can clean up most of that using a photo processing package.
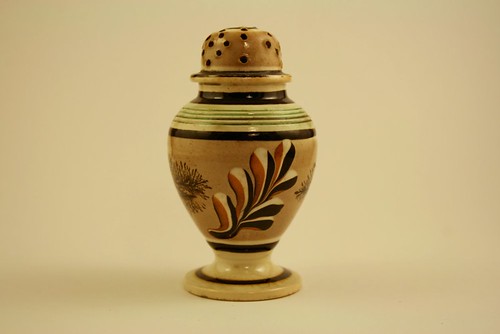
Be judicious about correcting colors in your pictures. I removed the yellow cast in the above photo, but I was careful not to overcorrect the colors. Colors can vary from monitor to monitor, but your photo should always be faithful to your actual article. You don't want your customer to get upset because the item she received from you doesn't resemble the picture you posted!
Or you can also avoid that yellowish cast by adjusting the white balance on the camera before taking your pictures. I haven't played around with my white balance yet, but it's on my to-do list now.
FYI, I started using a digital camera in 2007. A year later I began using Flickr to upload and store my photos. I use the associated photo editing package Picnik to do at least some nominal clean up. I've taken a couple of seminars on photography through Virginia Tech, but much of what I know about digital photography has come through trial and error. I do not claim to be a professional photographer and there is much I'm still learning about photography.
And that funny little piece of pottery seen in the pictures above? That's a mochaware pepperpot or caster, the 1800s version of a pepper shaker. I found it at a tag sale back in the mid 1990s in Tidewater, VA. I don't know anything about its provenance other than the sale was held by a well respected auctioneer who had been in the business for years. He had wonderful tag sales every so often, presumably to move merchandise that didn't sell at auction. The auctioneer would let you put your finds together in a box and then charge you by the box lot after he gave it a once over. Sometimes he'd pull everything out to see what you had, and other times he'd barely give it a glance. I remember this particular box was full of assorted kitchenware, some Texas ware, vintage pottery, and this pepperpot wrapped up in some vintage tablecloths. The auctioneer gave the box a glance and waved it away. We paid $20.00 for the box, so that was probably only about $2.00 or $3.00 for the pepperpot.
I prefer taking photos outside in natural light, but at this time of the year it's very hard to get a good shot because 1) it's always dark, 2) it's often windy with some form of precipitation, or 3) it's dark, windy, and either raining or sleeting. On the rare occasion that it's not dark and not windy, and some form of water isn't coming down from the sky, the sun will be so low on the horizon that the light is harsh, the shadows are too stark, and all my pictures look like crap.
So what do you do when you need to take good photographs of something you want to sell online, but you don't have any natural light to work with? Use a light box.
Steve built me a light box out of a cardboard box for Christmas. There are many tutorials on how to do this on the web, just search for "DIY light box" and you'll find them. Essentially a light box is a box with windows covered by thin white material or tissue paper. There are lights outside the box shining light into the middle of the box, which is where you place the object you want to photograph. The light is filtered through the material or paper to eliminate harsh shadows. A sheet of curved white posterboard provides the background inside the box and also produces a pretty cool effect known as the "infinite sweep" or "infinite horizon" in your photos.
So what does a light box look like? Here's my light box set up on the dining room table. The overhead light provides some illumination, but the desk and work lights set up around the box are what really makes it work.

No, it doesn't look like much, but look at what it can do:

Florescent lights will give a yellowish cast to the light. Here is an original, untouched photo.

However, you can clean up most of that using a photo processing package.

Be judicious about correcting colors in your pictures. I removed the yellow cast in the above photo, but I was careful not to overcorrect the colors. Colors can vary from monitor to monitor, but your photo should always be faithful to your actual article. You don't want your customer to get upset because the item she received from you doesn't resemble the picture you posted!
Or you can also avoid that yellowish cast by adjusting the white balance on the camera before taking your pictures. I haven't played around with my white balance yet, but it's on my to-do list now.
FYI, I started using a digital camera in 2007. A year later I began using Flickr to upload and store my photos. I use the associated photo editing package Picnik to do at least some nominal clean up. I've taken a couple of seminars on photography through Virginia Tech, but much of what I know about digital photography has come through trial and error. I do not claim to be a professional photographer and there is much I'm still learning about photography.
And that funny little piece of pottery seen in the pictures above? That's a mochaware pepperpot or caster, the 1800s version of a pepper shaker. I found it at a tag sale back in the mid 1990s in Tidewater, VA. I don't know anything about its provenance other than the sale was held by a well respected auctioneer who had been in the business for years. He had wonderful tag sales every so often, presumably to move merchandise that didn't sell at auction. The auctioneer would let you put your finds together in a box and then charge you by the box lot after he gave it a once over. Sometimes he'd pull everything out to see what you had, and other times he'd barely give it a glance. I remember this particular box was full of assorted kitchenware, some Texas ware, vintage pottery, and this pepperpot wrapped up in some vintage tablecloths. The auctioneer gave the box a glance and waved it away. We paid $20.00 for the box, so that was probably only about $2.00 or $3.00 for the pepperpot.
I'm pretty sure this auctioneer would have recognized the value of this piece, so I don't think he realized it was in the tag sale. I've seen similar pieces on line described as English ware from the early to mid 1800s. This particular piece has a baluster form with engine turning on the shoulders and has both dendritic and slip applied decorations. Online these pieces are priced anywhere from several hundred dollars to $600-800 dollars. Christie's has auctioned them for several thousand dollars. Needless to say, that was a great tag sale!
For more information about mochaware, I recommend Colonial Sense's page on mochaware.
(Oh look! They used a light box for many of those photos, too!)
For more information about mochaware, I recommend Colonial Sense's page on mochaware.
(Oh look! They used a light box for many of those photos, too!)
Monday, January 23, 2012
Valentines for the Bride
A bride to be in Texas contacted me on Etsy about making favors for her upcoming wedding next month. Her wedding date is right before Valentine's Day. One of her colors is a hot pink. She's marrying Mr. Buttons.
Have I got just the right favors for her!
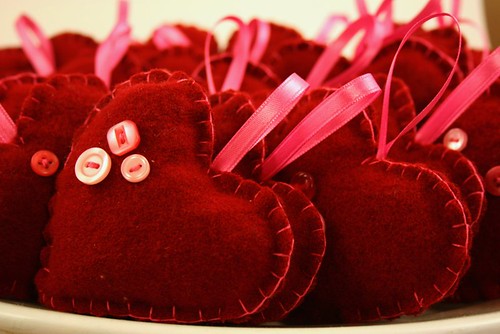

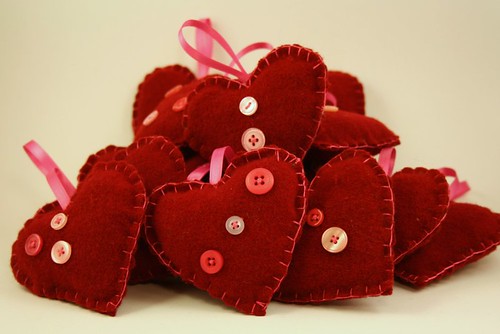
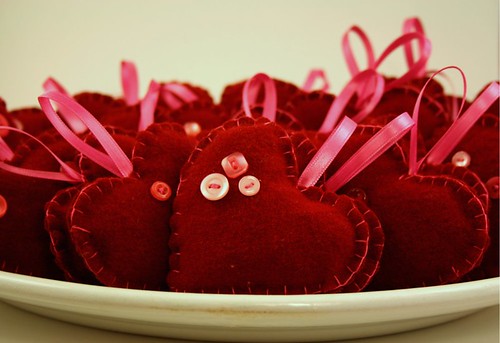
These little valentine goodies will be in the mail for her tomorrow. Best wishes and congratulations to the future Mr. and Mrs. Buttons!
Have I got just the right favors for her!


These little valentine goodies will be in the mail for her tomorrow. Best wishes and congratulations to the future Mr. and Mrs. Buttons!
Saturday, January 21, 2012
Featured!
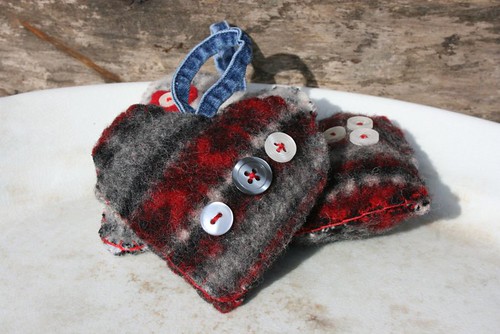
My rustic wool heart ornaments were featured over at North Wood Rustics as part of Featured Friday for the Rustics Reign Team on Etsy! Thanks, Chris!
http://northwoodsrustics.blogspot.com/2012/01/feature-friday-for-january-20.html

http://northwoodsrustics.blogspot.com/2012/01/feature-friday-for-january-20.html
Wednesday, January 4, 2012
Quilts in 2011
I'm very pleased that all three quilts I posted in my Etsy shop last year were sold by the end of the year. That's a pretty gratifying way to end the year.
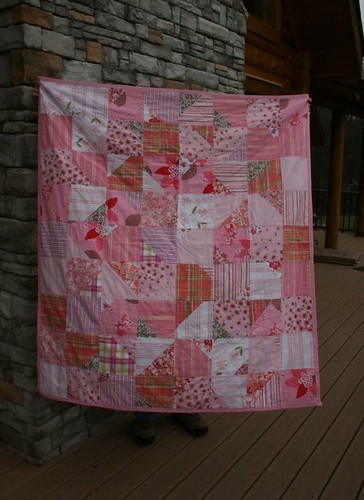
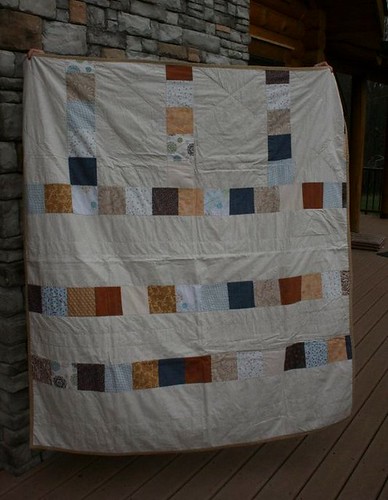
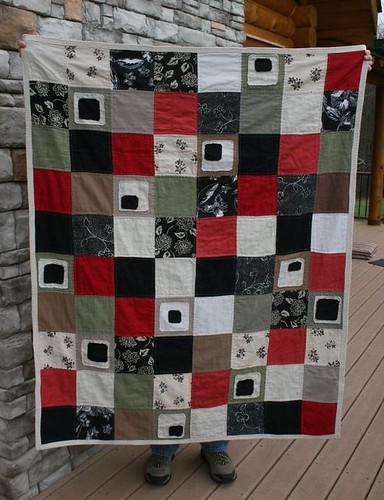


In 2011 I also made a quilt for my mother and another one that was a commission.
And I made a pair of quilted table runners for Christmas presents.
Not a bad year at all. But now it's 2012, and what have I done lately? Back to the quilt mines!
Subscribe to:
Comments (Atom)


