Sunday, November 13, 2011

Vintage Belle on Etsy

Well, it's the start of the holiday season and over the next month or so I thought I might showcase a few sellers that I admire on Etsy.

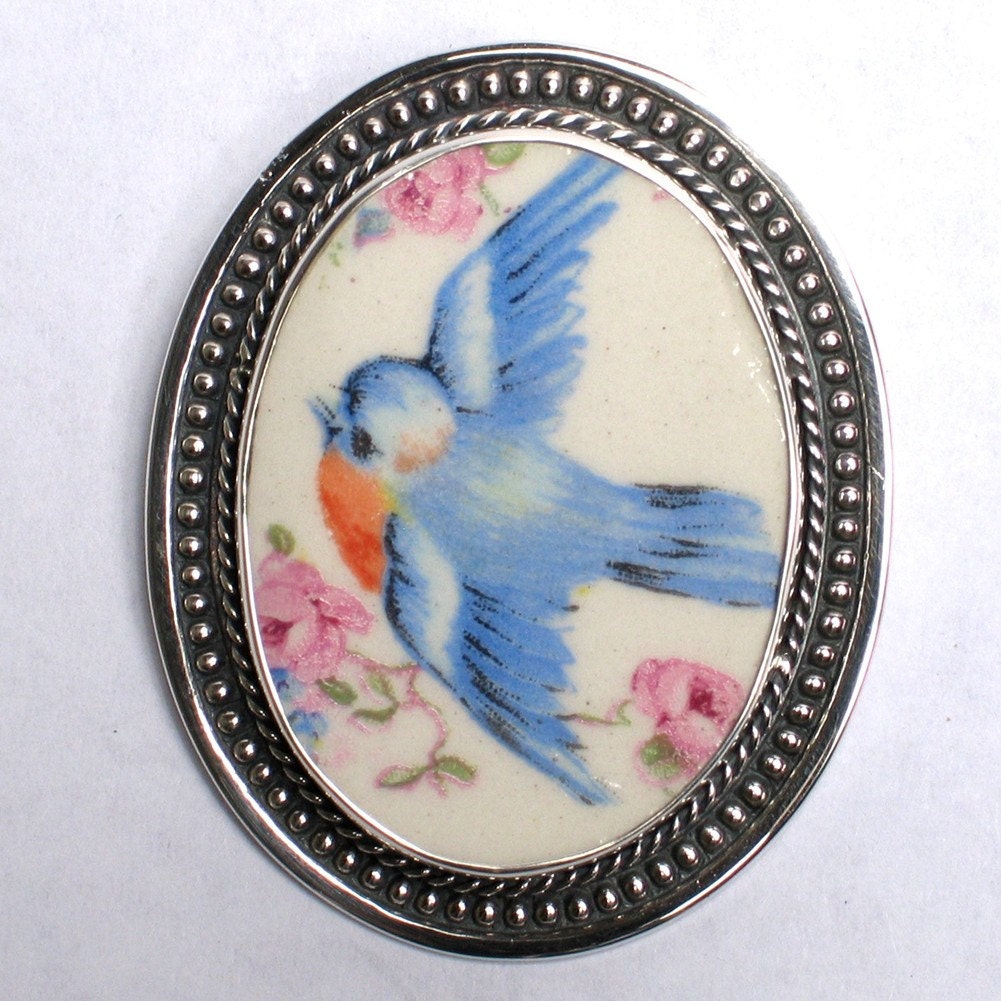
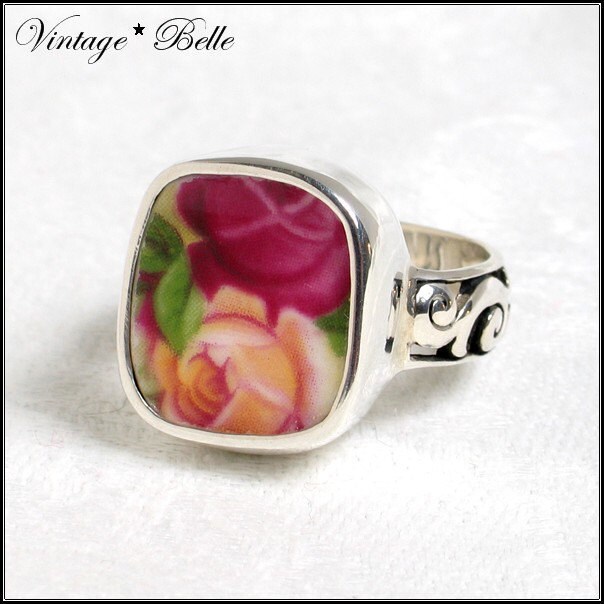
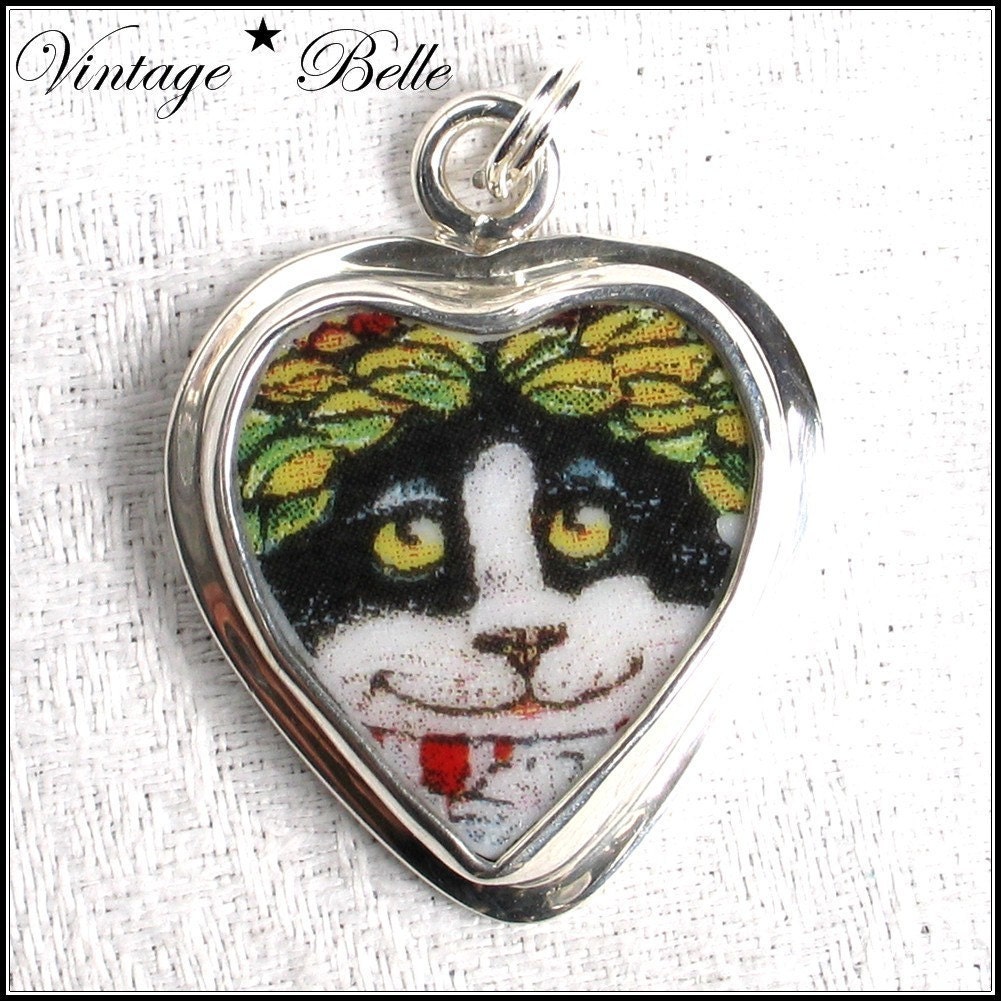
I stumbled across Vintage Belle the other week and I can't stop admiring this shop. The artists make beautiful jewelry out of salvaged bits of broken china set in sterling silver, including pins, earrings, and rings. I've always like mosaics and I appreciate the idea of remaking pieces of broken china into something of beauty.

Their pieces have a lovely romantic feel, such as this bluebird pin:


And this ring:


And some items are just downright amusing, like these two charms:


My grandmother had a set of china in the Virginia Rose pattern. It was beautiful and I'll always think of her when I see it, but the pattern doesn't fit my lifestyle and I don't particularly want any pieces of my own. One of Vintage Belle's creations would be a fabulous but functional way to remember a loved one and her china at the same time.

Saturday, November 12, 2011

Holidays? What holidays?

I'm slowly, slowly getting more things ready to list in the shop. I've got so many projects underway that it seems that I barely make any progress on any of them...and that's when I have time not spent in the kitchen or the garden. But the 30 degree temps have arrived and shut down the garden, and I've only got a half gallon of hot peppers left in the fridge for jam making, so I'm hoping I'll have more time for a needle and thread now. Good thing, too, with December looming ominously on the horizon.

StackedDutchHeartBloomsOct2011

I did put another set of quilted ornaments in my Etsy shop yesterday. These are cut from an abandoned, hand quilted project that my mom found at a garage sale. Some of the quilting included a flower motif in a sort of Dresden plate design. I fussy cut the quilt to capture these flowers and then highlighted them with embroidery floss. I rather like the way they turned out (and of course I'm hoping someone else does, too). 

Currently my works-in-progress pile includes a baby quilt commissioned by my mother-in-law. I hope to post a picture of the quilt top by the end of the weekend, but that may be overly optimistic. A friend from high school has asked me to make a set of plush pillows based on the characters from the Pacman video game as a gift for her son. That's not my usual cup of tea, but I don't think they'll be too hard and I could use a little more experience in making stuffed animals/pillows. Then there's the April Showers quilt top that still languishing on my quilt wall. At this rate it may be next April before I finish that one.

And because I'm totally oblivious to the actual calendar date, I've got some new ideas for holiday items this year. A holly leaf garland, a yo-yo garland, a new version of my primitive cat for Christmas....so many ideas swirling through my head.

I will likely be making the bulk of my Christmas gifts this year. For obvious reasons I won't be talking too much about them directly in public until they've been gifted, but I might get some peeks posted here before long. But now I need another cup of coffee before I return to the quilt mines this morning.

Wednesday, September 14, 2011

Time Warp

It was July and now it's September. It seems like I've been in a time warp and now it's fall.

I had some crafting plans for the summer. A watermelon quilt, some red, white and blue projects for the Fourth of July, and maybe a shell ornament or two made out of felted wool. Oh well, they'll wait until next year.

Now it's time for pumpkins, colored leaves, and Halloween candy.....Hello, Fall!

FallPennyRugSept2011frame

This is a penny rug I finished yesterday. I can't help but think of Butterfinger candy bars, chocolate drops, and caramel corn when I see these colors together. I'm not sure why all the candy comes to mind, unless it's an automatic association between fall and Halloween candy for me.

FallPennyMasonJarSept2011frame

FallPennyCloseup2Sept2011frame

FallPennyCloseup3Sept2011frame

I'm really pleased with the way this rug turned out. I should have it listed in my Etsy shop tomorrow if I can get the photos uploaded today. I've been using Flickr for my photo editing and I've been pleased with it so far, but they've just changed some of the features and it's taken me a little while to get used to them. I could use a photo editing package that Steve bought me for Christmas the other year, but 1) I've gotten used to Flickr and 2) we haven't worked out a good system for my laptop to access the external drive we use to store all our photos (a Mac vs PC issue). And then sometimes it just takes me awhile to get a good picture of my items. This last photo with the pumpkin is a good example. You would think that a log frame house would be the perfect backdrop for any rustic, folk art, or primitive themed object, right? 

Somehow it's not. Either the lighting is too harsh or the shadows are too dark or the decking just looks plain weird. And I usually forget to check what might be in the background of my photo, so often there's a big electrical pole in the distance or an unsightly black spot of washed out dirt where I just moved a flower pot out of the way on the left there. (Ahem. In my defense, at least it's not the spot where the bats have been pooping.)

FallPennyPumpkinFrame

I've been looking at pictures on Etsy and I like the ones where the item is placed in front of a simple wooden shutter or the quilt is simply draped over a wooden rail fence. While our back deck railing is made of wood logs, it's in dire need of being revarnished and will leave icky yellow flakes of old varnish on anything I put over it. Our neighbor's fencing is electrified barbed wire, and that's just not going to give the same atmosphere, will it? 

I don't want to invest much into photo props for the items I want to sell, but good pictures really do make a difference when you're selling online. When I first set up my Etsy store, I knew that the photos would be important to any prospective buyer since they can't actually pick up the item and handle it in person. Still, I didn't realize how much time it can take to photograph an item to it's best advantage and then edit the photo for uploading to Etsy. So much to learn.


Sunday, July 10, 2011

What do you mean it's July already?

No, I haven't fallen off the face of the earth. I just took an unplanned, unannounced hiatus from posting here. Things got busy in May and continued through June and while they haven't really let up in July, I do plan to post a little more frequently from now on even though work, travel, and the garden have taken up most of my time this summer. I haven't had much time to create lately but I do have a few projects to show you next week.

But first I'd like to give a shout out to Kim Franklin at Trashy Crafter, who was kind enough to include my Modern Linen Quilt in her list of Top Ten Green Wedding Gifts back in May. Kim's blog features some great examples of upcycled crafts and I'm alway amazed by the artists and their work that I see there. Kim also interviewed me in June, which you can read about here. Sad to say, the disorganization of my studio has not improved since June!

Wednesday, May 25, 2011

A Quilt for Mother's Day

It's taken me forever, but I finally finished a quilt that's been a work in progress for quite some time.

Mother'sDayQuiltButterflyApplique

When I first started quilting I wanted very much to do a half-square triangle block quilt. I also had some linen fabric that I wanted to use, so I began making half-square triangle blocks with it. I used a solid sage green and a floral print with sage green, yellow, and natural linen. Both fabrics were taken from recycled linen clothing I found at my local thrift store.

Anyone who's worked with half-square triangle blocks and/or linen is probably shaking their heads right now. Half-square triangles can be tricky for a novice, and linen...well, linen tends to stretch out of shape when you work with it. Especially if you're making half-square triangles out of it without any regard to the fabric's bias.

I knew the linen seemed to warp easily as I made my half-square triangle blocks, but I decided to forge ahead and see what I could make out of it. Pinwheel blocks!, I thought in blissful ignorance. Because if half-square triangle blocks made of linen seem a get a little out of shape a little too easily, you should realize that linen pinwheel blocks are downright finicky.

But I kept at it, making those half-square triangle blocks and then the pinwheel blocks. Then I realized that not all of my pinwheel blocks were turning in the same direction. I had assembled half of them turning clockwise and the other half turning counter clockwise. I really didn't want to rip the seams out to remake all the blocks turning in the same direction, but I didn't have enough solid sage green material left over to make additional blocks.

That's when I set the whole project aside for half a year. Then last fall I realized that I could make some blocks using the floral print linen with some oatmeal-colored linen that I had on hand. I made up the half-square triangle blocks, but never got around to assembling them into pinwheel blocks before the holidays.

Fast forward to late winter. I decided it was time to get this quilt finished. I laid out the blocks that I had assembled and then realized that I didn't really have enough of the floral print/oatmeal half-triangle squares completed to make enough pinwheel blocks. I threw my hands up in the air and set the project aside once more.

Finally, the week after Mother's Day, I forced myself to re-evaluate this project and find some way to complete it. This time the stars came into alignment and I quickly found an arrangement of blocks that 1) I liked, and 2) didn't require any addition block assembly. I set the clockwise-turning pinwheels on the left and the counter-clockwise turning pinwheels on the right. In the center I alternated the oatmeal and floral print half-square triangles in a flying goose pyramid and a divided triangle pattern. I used solid oatmeal-colored linen on the sides to make the throw-sized quilt a decent size and then assembled my quilt top. I used an old flannel sheet for batting, and for the backing, I decided to use a spectacular vintage 1970s cotton-poly blend sheet.

Mother'sDayQuiltBack

There's a story behind this sheet. My grandmother, my mom's mom, loved the color yellow. And she adored butterflies and plants. When I found this particular bedsheet with yellow and orange butterflies and ferns, I immediately thought of Memaw. It was a perfect backing for a Mother's Day quilt for my mom (even at that point it was well past Mother's Day and I hadn't even finished assembling it yet) and the colors were a nice counterpoint to the sage greens on the front of the quilt.

So there I was, congratulating myself on wrapping up an unfinished project when it occurred to me that I had not even considered how I was going to bind this quilt. We were leaving to visit my parents the day after the next and there really wasn't enough time to make a binding, quilt the quilt, and attach the binding before we were going to leave. That's when I decided to cheat a little. I layered the quilt so that I could stitch all around except for about a 5 inch gap, then flip it inside out and close the seam with a ladder stitch. Voila! A self-seamed quilt. I ran a top stitch all around the inside edge of the quilt, then stitched in the ditch around each half-square triangle block. Not the most sophisticated quilting, but it finished the quilt nicely in the amount of time I had left. I popped the quilt in the washer and then dried it while I rushed around packing for our upcoming trip.

Mother'sDayQuiltButterflyApplique

See that butterfly applique on the top of the quilt? When I took the quilt out of the dryer I saw that the seams had separated in one place on the quilt top. One half-square triangle block had really stretched beyond my seam allowance. No matter at this point in the game! I cut out a butterfly from a remnant of the backing fabric and appliqued it to the front to cover the popped seam. I use Steam-A-Seam for my appliques, which adheres really well. I also ran a machine stitch around the outside of the applique for good measure. The sheet fabric will fray up some with time, but it still suits this particular quilt.

I made a label for the quilt and then I was done! One less UFO (UnFinished Object) in my work-in-progress pile!

Mother'sDayQuiltLabel

I'm not really happy with the way my labels look, but I still would like to write them by hand. I'd like something a little neater, but my indelible pens seem to skip and drag on the fabric when I write on it. I think I'm going to try putting the fabric on a piece of sandpaper before writing my next label. Hopefully that will hold the fabric in place and allow me to write more smoothly.

And of course my mom loved the quilt when I gave it to her, even with its quirky flaws. One of the first things she said was, "I think your grandmother had those sheets."

Sometimes it's the quilt that you mess up that teaches you the most.

Monday, May 2, 2011

Something New

I finished my first penny rug today. Penny rugs are an American folk art that originated during the 1880s, when cloth was often scarce and home makers reused old wool clothes to make decorative items. Typically a penny rug features graduated circles stacked on each other and sewn together using a blanket stitch. Coins were used as the templates for the smaller circles, thus the name penny rug. Geometric patterns were a common motive, along with hearts, flowers, stars, and animals. Despite the name, penny rugs weren't used on the floor. They were used to cover chair seats, decorate table tops, or hung on the wall.

I think traditionally the circles were sewn on a larger foundation piece and backed with something like burlap or a feed sack. Modern penny rugs are often made out of individual circles that are sewn along the edges to form the piece, as I've done here. I used a simple stab stitch to attach the hearts and circles to the foundation circles, and a blanket stitch to attach the tops to the bottom circles.

BlueGrayHeartPennyTop

I've signed this piece "TAD 2011," although the embroidery is a little hard to see in this photo.

BlueGrayHeartPennyBottom


I used a plaid tweed with light blue, gray, and caramel stripes, along with a solid light blue and a nubbier gray. The light blue came from a felted sweater that featured a solid weave and sections of ribbing, both of which I've used in this piece. The plaid was probably from a wool skirt or jacket.

BlueGrayHeartPennyTopAngle1


Each circle is sewn to a backing circle of cream felt that I cut from an old wool blanket.

BlueGrayHeartPennyBottomAngle1

Many people use penny rugs as a candle mat, but I think I'd be more likely to use this as a decorative trivet on the table. The thick layers of wool are perfect for protecting the table surface from heat and steam.

BlueGrayHeartPennyCandle

I've always like penny rugs with their combinations of colors and patterns and it's a perfect project for using up those little scraps of leftover wool felt, so it was only a matter of time that I tried sewing one myself. I enjoyed the simple applique embroidery and the circles came together quicker than I expected. 
This rug will be added to my shop soon and I've already started several others. I plan to make a few in a patriotic theme for the summer and then do some pumpkin motifs for the fall.